Creating an Itinerary for an Event Booking with Multiple Function Room Reservations
The Itinerary is a great way to map out everything that happens during an event booking.
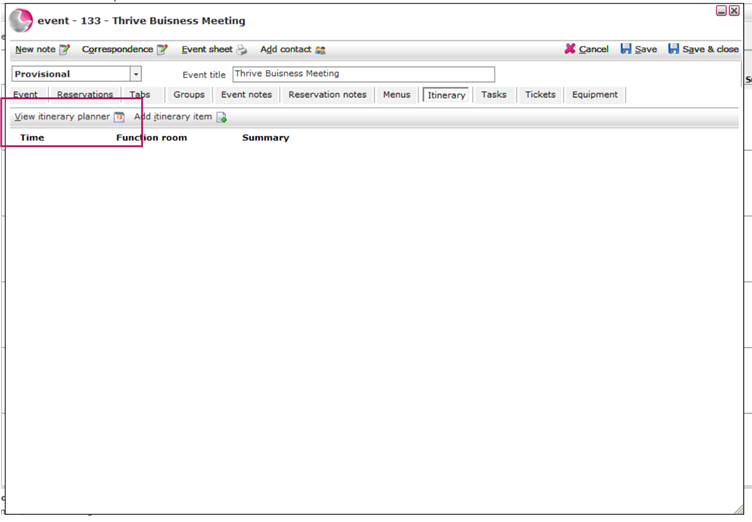
- Open an Event Booking and go to the Itinerary page.
- Click View Itinerary Planner to start creating the event itinerary.
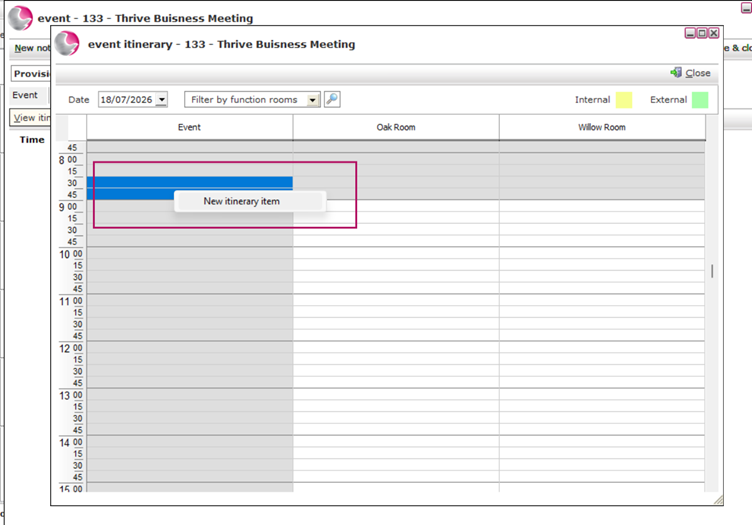
3. The planner includes an Event column for activities related to the event as a whole, along with separate columns for each function room.
- Highlight the required time slot in one of the columns, then right-click to open the hidden menu and select New Itinerary Item.
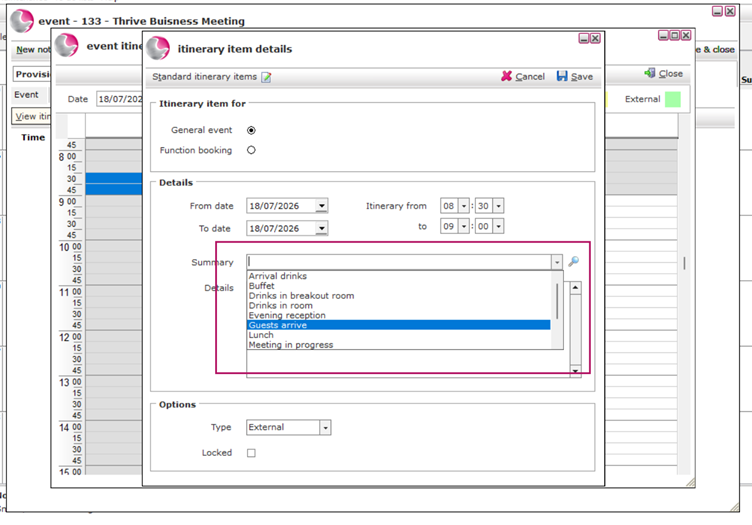
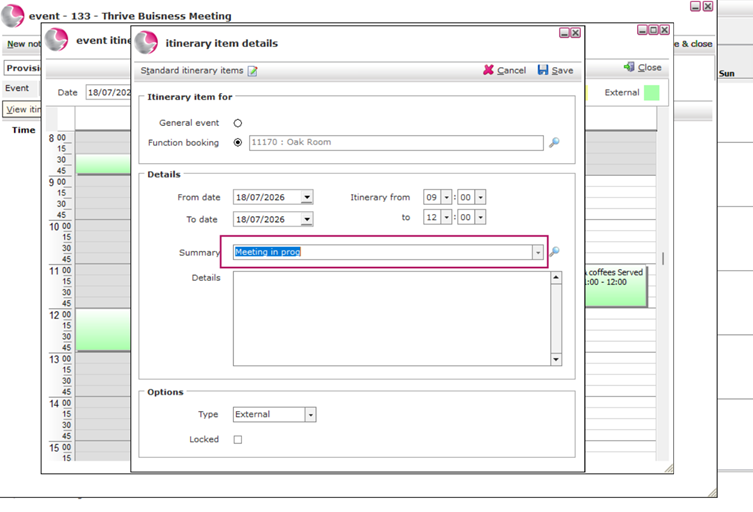
5. This will open the Itinerary Item form.
- In this example, we selected the Event column, so General Event is automatically ticked.
- The Date and Time are automatically populated based on the time slot you selected in the planner.
- In the Summary field, select an item from the drop-down list.
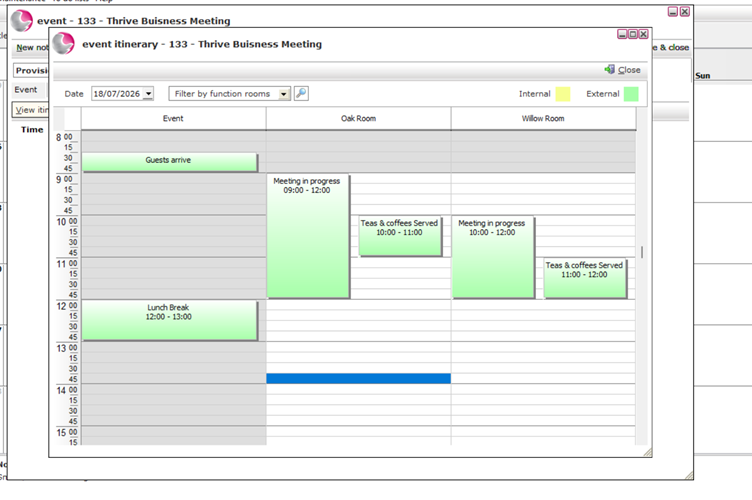
6. The first item, Guest Arrival, will now appear in the event itinerary.
- Next, highlight the time between 9:00 AM and 12:00 PM in the Oak Room column to add the meeting.
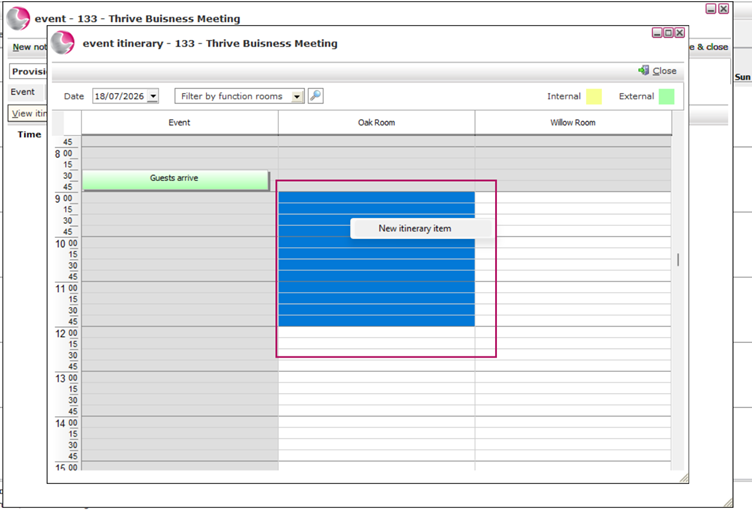
8. If the required itinerary item is not available in the Summary drop-down list, simply type it into the Summary field.
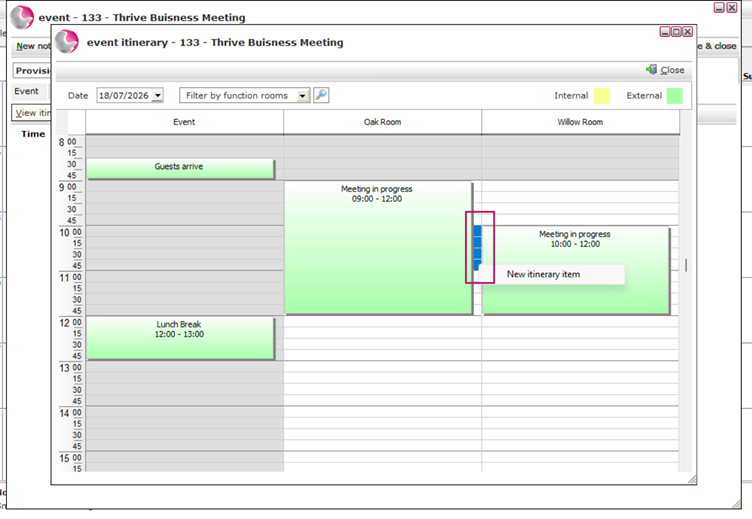
9. If two activities are happening at the same time, click the free space next to the existing itinerary item, right-click to open the hidden menu, and select New Itinerary Item.
10. Enter the activity in the Summary field and click Save.
.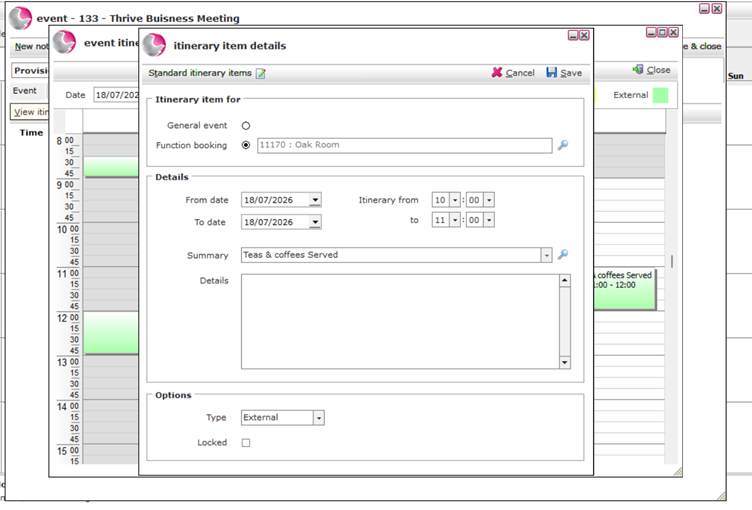
11. You can add multiple itinerary items at the same time, allowing you to schedule simultaneous activities.