
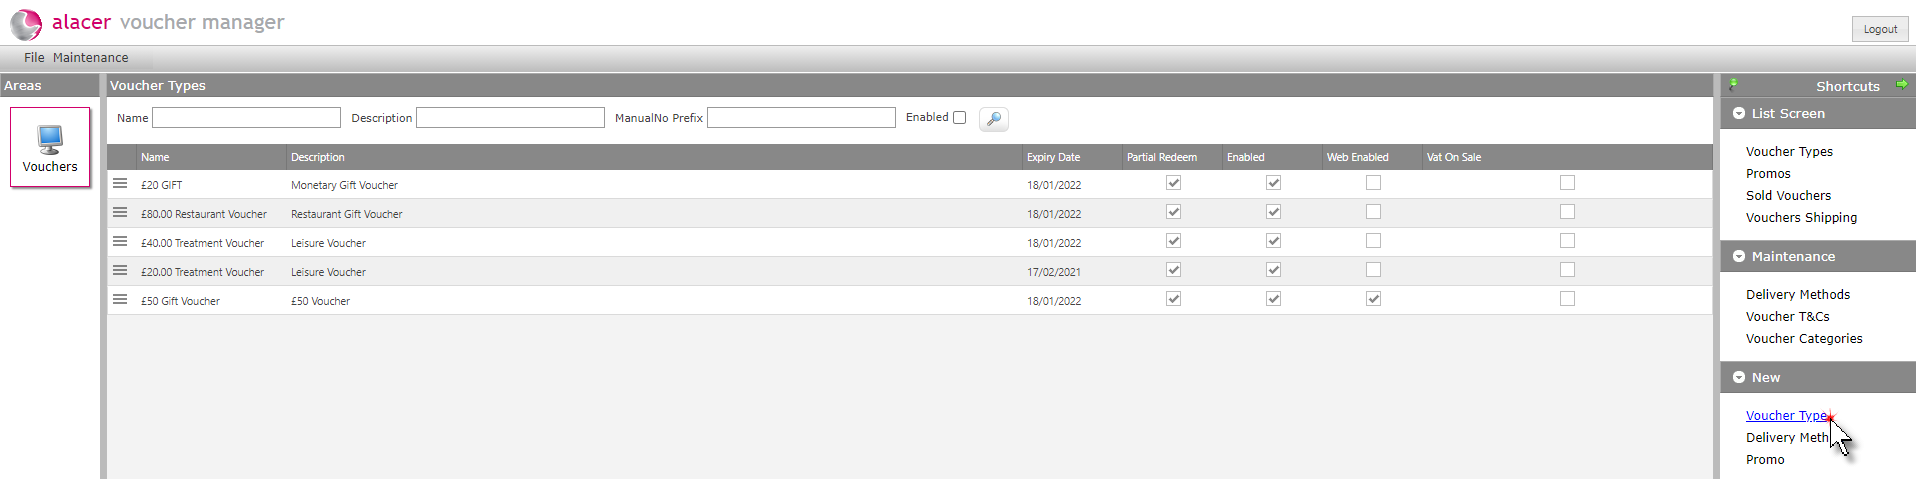
1. Click Voucher Type under the New short cut.
2. Complete the Voucher type maintenance form.
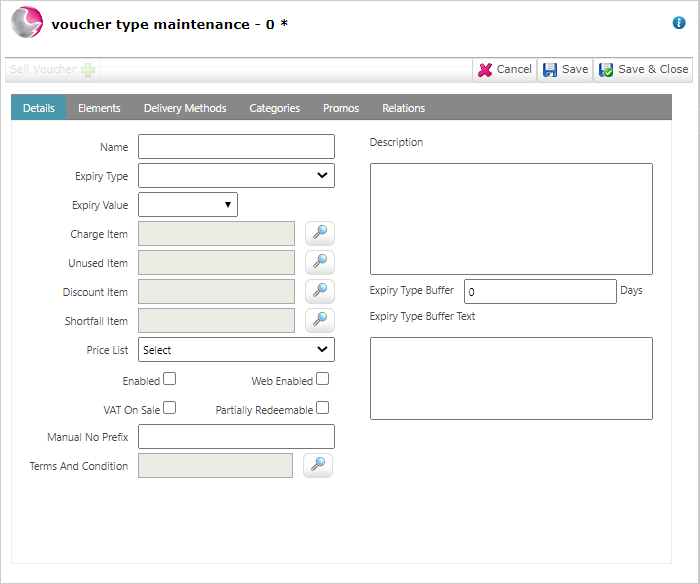
Name: Enter the name of the voucher type,
For example: Afternoon Tea for 2 Voucher, Dinner, Bed & Breakfast Voucher, Treatment for 1 Voucher etc.
Expiry Type:
Date: The Voucher will expire on a specific date no matter when it was purchased.
Duration: The voucher will expire in a set number of days
Expiry Value:
Date: Select the date the voucher expires on.
Duration: Enter the amount of days the voucher is valid for.
For example: 365 Days
Charge Item: Select the charge item for the voucher. This item will need to created in admin manager and should be named the same as the specific voucher type being created and should contain the sale price of the voucher.
See How to Create a New Item(Admin Manager)
Unused Item: Select the unused item. This item will need to created in admin manager and is usually named unused voucher with a price of £0.00.
If a voucher is not redeemed and is manually expired, the revenue for the unused voucher will appear against this item in item sales reports.
Discount Item: Select the discount item. This item will need to created in admin manager and is usually named voucher discount with a price of £0.00.
Shortfall Item: Select the shortfall item. This item will need to created in admin manager and is usually named voucher shortfall with a price of £0.00.
This item is used to handle the future price increase or decrease of the charge item attached to the voucher.
Price List: Select a price list.
See How to Create a New Price List
Enable: Select enabled to allow the voucher type to be sold.
For more information regarding the voucher web engine please contact the Alacer sales team on 0333 313 0066 option 1
Web Enabled: Tick enabled if the voucher type is available to buy from the voucher web engine
Partially Redeemable: Tick if the voucher can be partially redeemed.
For example: With a £50.00 voucher, the guest could redeem £25.00 on one visit an use the remaining £25.00 on the next visit.
Manual No Prefix: Enter an optional manual no prefix for the voucher type, the prefix will be displayed at the beginning of each voucher code when a voucher is sold.
For example: If the voucher is a Christmas voucher and the manual no prefix XMAS is applied to the voucher type, when the voucher is sold the voucher code given to the guest would be XMAS765890T.
Terms And Conditions: Select the Terms and Conditions for the voucher.
The terms and conditions wording will displayed alongside online voucher sales to make customers aware of the sale conditions
See How to Create New Terms and Conditions
Description: Enter the long description for the voucher. The description will be displayed on the printed voucher and alongside online voucher sales.
For example:
Afternoon Tea Voucher:
A selection of freshly prepared finger sandwiches
Warm scones with clotted cream and preserves
A range of home made cakes and pastries
Your choice from a range of teas
Expiry Type Buffer: If required, enter the amount of days for the expiry buffer. If a voucher is sold today the expiry time wont start until the amount of days entered have passed.
Expiry Type Buffer Text: Enter an explanation for the expiry type buffer.
3. Click on the elements page then Add element.
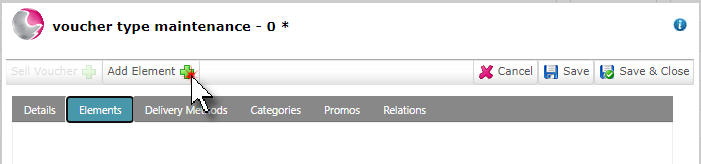
Elements are added to a voucher to determine what a voucher can be redeemed against. A Redemption Value will need to be added to define how much the voucher is worth.
4. Enter the redemption value then click add redemption.
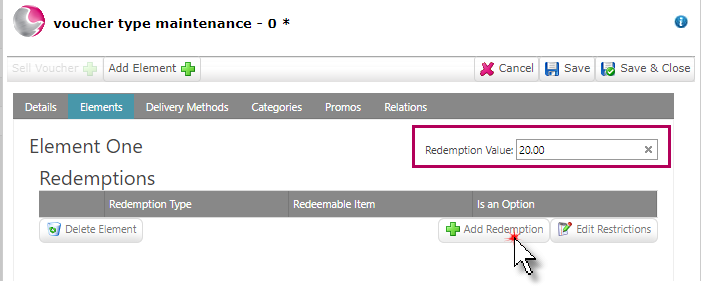
5. Choose a voucher element redemption type.
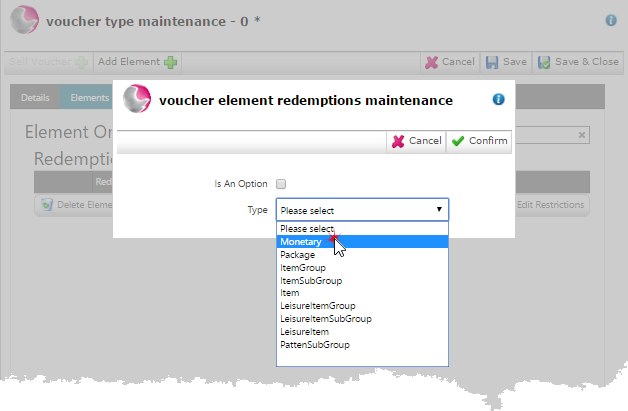
Please note: If a voucher can be redeemed against any item or package that is sold create it with the redemption element of monetary. If a voucher has been created with an element redemption type that is not monetary, the voucher can only be redeemed against the redemption element that has been selected and cannot be changed afterwards.
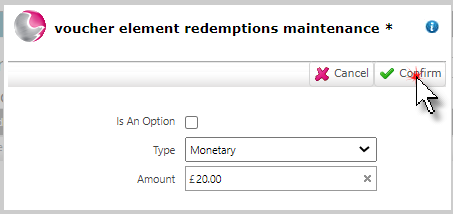
6. Enter the redemption amount again and click confirm.
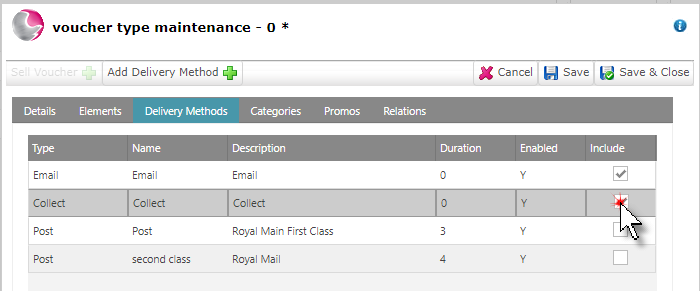
7. Click on the delivery methods page, tick the delivery methods that apply.
See How to Setup New Delivery Method
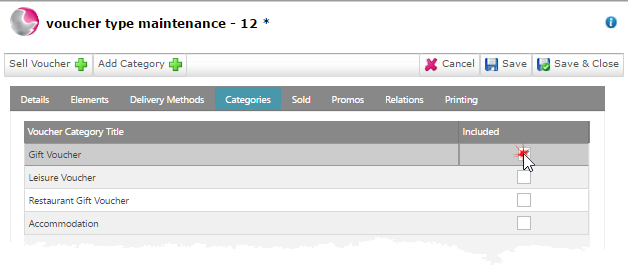
8. Click on the Categories page. Tick the voucher category that relates to the voucher type.
See How to Create New Voucher Category
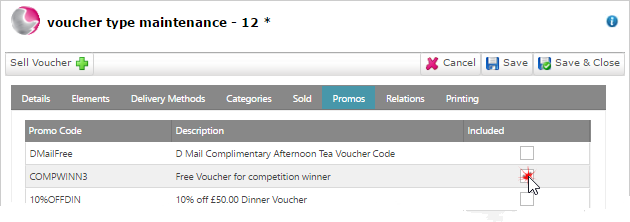
9. Click on the Promos page, if required select the promo code for use with the voucher type.
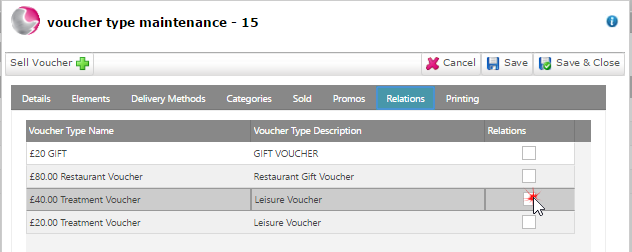
10. Click on the Relations page. If required select the voucher types.
Relations can be set up for use with the voucher web engine to display similar vouchers that customers may be interested in. The related vouchers will be shown once the customer has added a voucher to their basket.
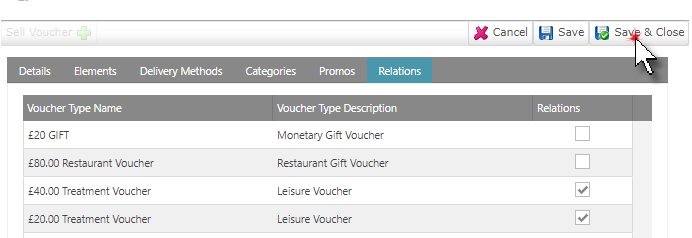
11. Click Save & Close.
See next: How to Sell a Voucher
How to Print or Email a Sold Voucher