
An Experience represents anything you offer your customers.
This could be a daily service, such as Lunch or Dinner, a regular event like a Sunday Roast, or a special occasion such as a Valentine's Day Dinner or Mother's Day Carvery.
1. To create a new Experience, go to Alacer Hospitality → Admin → Restaurant → Experiences and click New Experience.
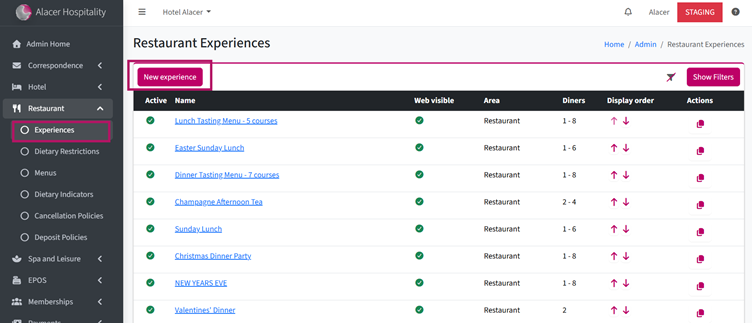
The New Experience form will open.
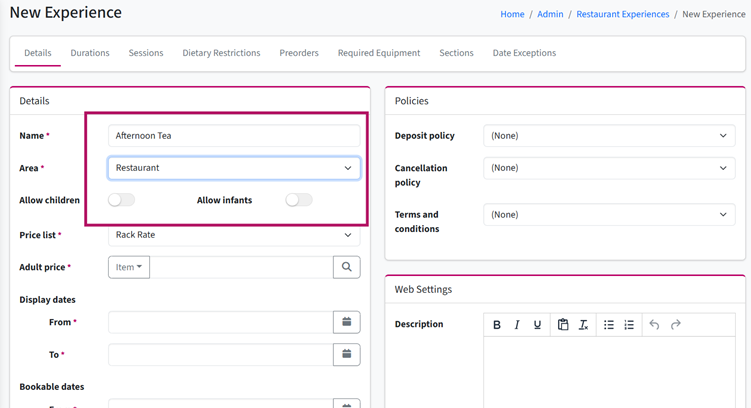
2. Enter a Name.
For example: Afternoon Tea.
This name can be displayed on your Restaurant Booking Engine and in customer emails.
3. Select the Area where this Experience will be available.
4. Choose whether Children and Infants are allowed.
If the Experience is advertised online, this helps guests identify which Experiences are suitable for families.
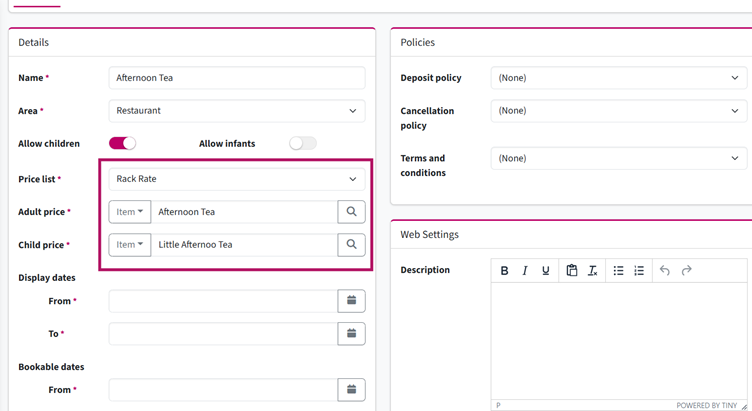
5. Select the Price List and attach an Adult Price Item. If children are allowed, attach a Child Price Item as well.
These item charges can be displayed on your Restaurant Booking Engine and, if enabled, automatically posted to the guest's tab when the reservation is made.
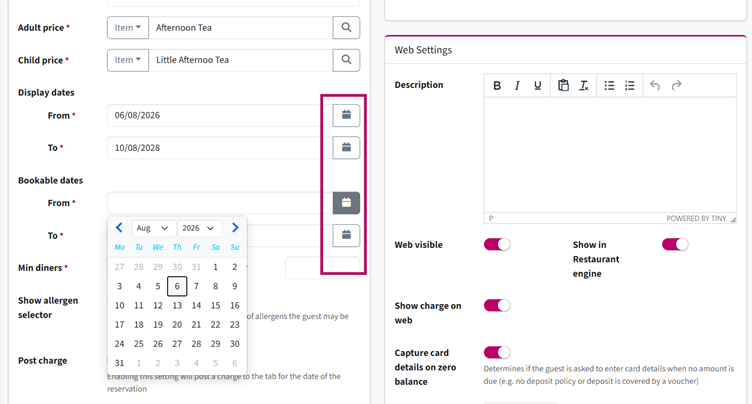
6. Set the Display Dates.
These dates control when the Experience is advertised on your Restaurant Booking Engine.
For example, you may want to advertise a Valentine's Day Dinner several weeks before February 14th.
7. Set the Bookable Dates.
These are the dates when guests can actually book the Experience.
For example:
Valentine's Day Dinner – 14th February only.
Afternoon Tea – Available across a wider date range.
8. Use the Calendar icon to select dates more easily.
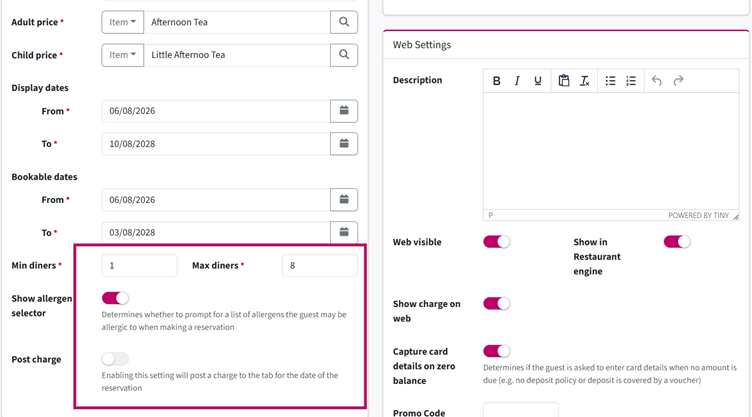
9. Enter the Minimum and Maximum Diners allowed for online bookings.
For example, if the maximum is 8, guests can book tables for up to 8 people online. Larger groups will see a message asking them to contact you directly, giving you more control over larger bookings.
10. Show Allergen Selector is enabled by default, allowing guests to provide allergy and dietary information when booking.
If you do not require this information, simply turn the toggle off.
11. Turn Post Charges on if you want the Adult and Child Price Items to be automatically posted to the guest's tab when the reservation is created.
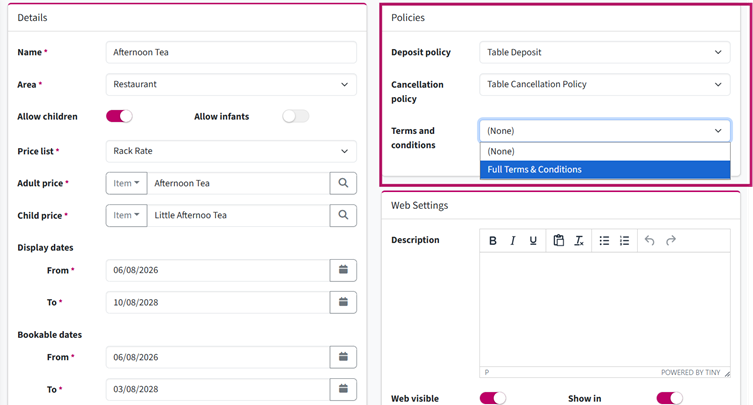
12. In the Policies section, select the policies that apply to this Experience:
- Deposit Policy
- Cancellation Policy
- Terms and Conditions
Need to create new one? See How to Create a Restaurant Deposit Policy
How to Create a Cancellation Policy
How to Create New Terms and Conditions
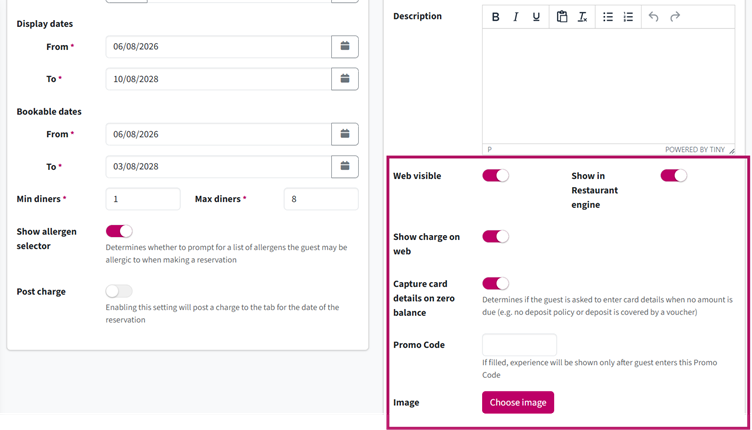
In the Web Settings section:
13. Add a Description to display on your Restaurant Booking Engine.
14. Turn Web Visible off if this Experience should only be available internally within Restaurant Manager.
15. Turn Show Charges on if you would like the price to be displayed online.
16. If guests are not paying a deposit when booking, you can still secure the reservation by leaving Capture Card Details on Zero Balance Reservations enabled.
See also: How to Set Up a Promo Code.
17. Add an image to help showcase your Experience on the Restaurant Booking Engine.
Example of Experience from a Restaurant Engine:

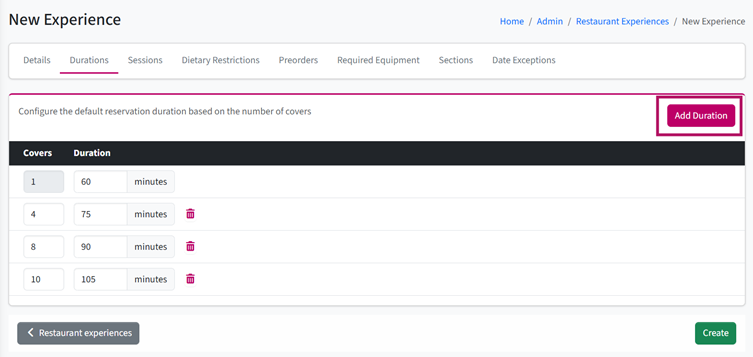
18. Scroll up and open Duration page.
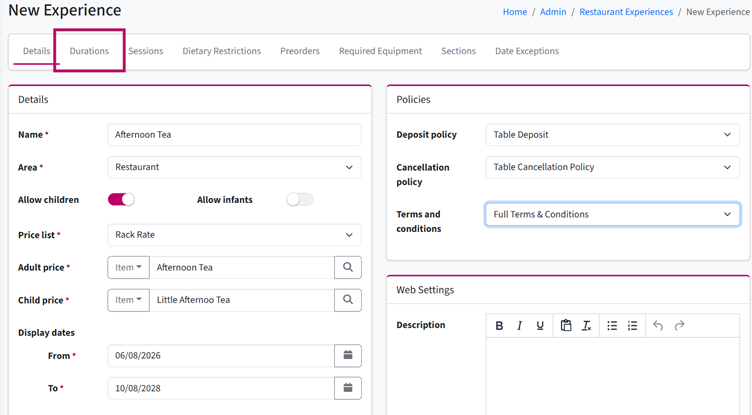
19. the Duration tab to define how long the Experience lasts based on the number of covers.
For example:
- 1–3 guests – 60 minutes
- 4–7 guests – 75 minutes
- 8–9 guests – 90 minutes
20. Click Add Duration to create additional duration rules for different party sizes. The system will use the appropriate duration based on the number of guests in the reservation.
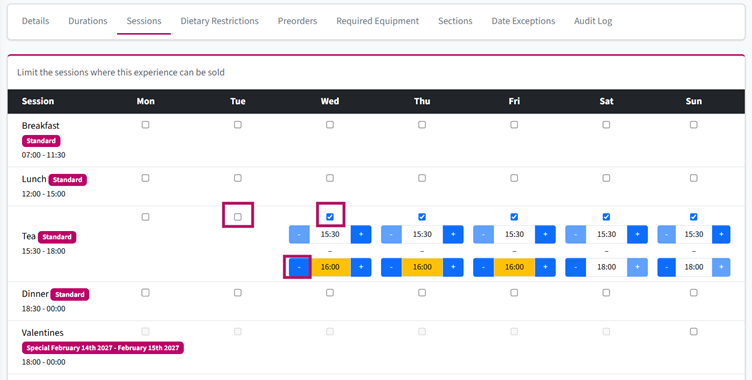
21. Open the Sessions tab to choose which days and sessions the Experience is available.
For example, your Afternoon Tea may only run from Wednesday to Sunday.
22. You can also use the + and − buttons to adjust the session times.
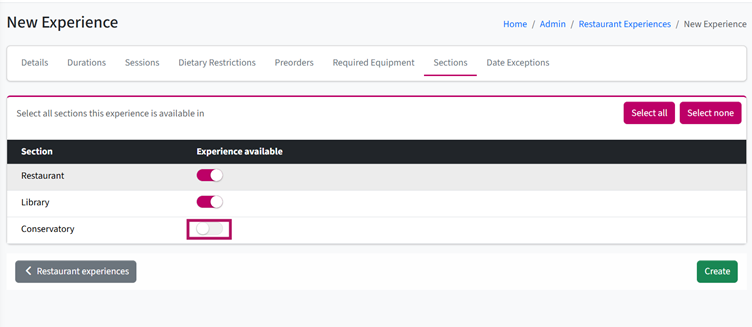
23. Open the Sections tab to choose which restaurant sections can be used for this Experience.
Note: If a section is not web enabled in Restaurant Manager, guests will not be able to book tables in that section online, even if the Experience itself is web visible.
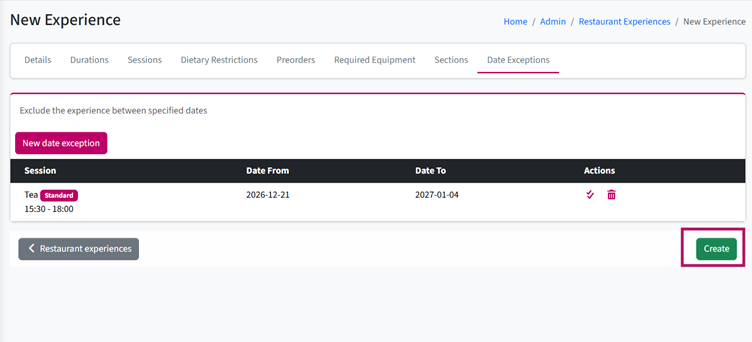
24. Use the Date Exceptions tab to exclude dates when the Experience is not available.
For example, you may offer Afternoon Tea throughout the year but pause it during the Christmas and New Year period while you run a festive menu instead.
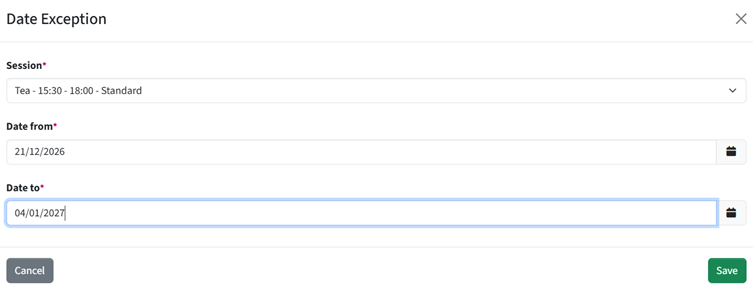
25. Click New Date Exception
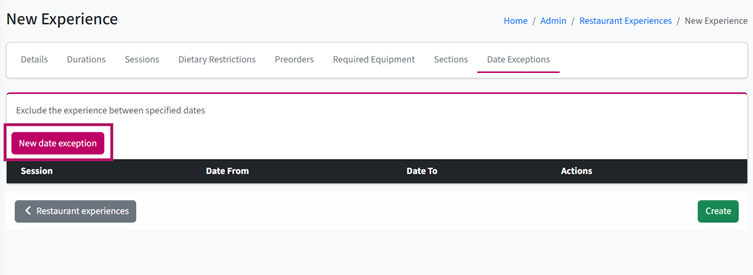
26. Select the Session.
27. Choose the From and To dates during which the Experience should not be available.
28. Once you've finished configuring the Experience, click Create to save it.
See next: How to Set Up Dietary Restrictions to an Experience